I came across these on Etsy the other day and thought they were hysterical and perfect for an upcoming Christmas party. I couldn't justify spending $10-$20 per glass though. Here's how to make them yourself for just a few dollars.
Here's what you'll need.
Mason Jars
Dollar store candle sticks
E600 glue (or any super strong glue or epoxy)
Colorful beads (optional)
Sandpaper
Rubbing alcohol
First sand the bottom of the mason jars and the top rim of the candle stick, just enough to rough it up a bit.
Then use a little rubbing alcohol to clean the sandpaper dust up
Next, I cut up a few of those marti gras type necklaces and put the beads in the top of the candle stick. I found mine at 5 below, they were 4 for $1. This step is optional but I think it looks cute.
Put a thick ring of E6000 glue around the rim of the candle stick holder.
Stick them to the bottom of the mason jars and leave them upside down for 24 hours to dry.
Here's the finished product! It's that easy! If you really want to redneck it up you could make wine glass charms out of beer bottle tops. Have fun with it!
Tuesday, December 6, 2011
DIY Redneck wine glasses
Posted by Shana at 12:14 PM 0 comments
Labels: DIY, redneck wine glasses
Thursday, October 27, 2011
Mint Chocolate Pudding Shots in a chocolate cup & garnished with Andes mints
I'm the self proclaimed "Pudding Shot Lady". On the rare occasion that we get out without the kids, everyone knows what I'm bringing and unlike grandma who shows up every Christmas with a fruit cake that no one eats these things actually go...FAST!
I make all kinds of flavors but everyone's favorite seems to be the mint chocolate so I thought I'd share the recipe...
This time I decided to make them in chocolate shot glasses too. To make the chocolate cups all you need is some water balloons (or any small balloons) and chocolate melts. Just barely blow the balloons up. Then, wash them with soap and water and Dry (don't skip this step, extra moisture can affect the way the chocolate sets up). Melt the chocolate in the microwave or with a double boiler and just dip the balloon in, set them on wax paper and pop them in the fridge or freezer to harden up.
Take them out of the freezer and pop the balloons with a pin. Then, you should be able to peal the balloon out pretty easily. Regardless of what anyone tells you DON'T spray the balloons with cooking spray. I tried it on a few and It made it hard for the chocolate to stick. Then when I went to peal the balloon out they cracked because the chocolate was too thin.
I did have several cups with little holes in the bottom.
All I did was melt a little more chocolate and painted it on with a pastry brush.
All fixed!
Now onto the fun part! Here's the recipe...
1 pkg instant chocolate pudding
3/4 cup milk
1/2 cup Bailey's Irish Cream
1/4 cup Creme De Menthe
8oz tub of extra creamy cool whip
Mix pudding and milk together, add alcohol and fold in whipped cream. It's that simple!
The fastest and easiest way I've found to fill the cups is to poor the pudding into a ziploc bag and snip the corner.
Once they're all done I throw some Andes mints in the food processor and sprinkle them on the top.
Here's the final product....
Posted by Shana at 9:06 PM 0 comments
Labels: Chocolate cup, Chocolate shot glasses, Mint Chocolate pudding shots, recipe
Thursday, September 22, 2011
Corona
I came across an old photo of our English Bulldog Corona who passed away a couple of years ago. She was a the best dog ever and this is my favorite picture so I thought I'd share.
Posted by Shana at 9:28 PM 1 comments
Labels: English Bulldog puppy
Tuesday, September 6, 2011
Angry Birds Themed Birthday Party
As promised here are a few pictures from Micah's 5th birthday.


Posted by Shana at 7:39 PM 3 comments
Labels: angry birds cake, angry birds party decorations, Angry Birds themed birthday party
Monday, September 5, 2011
Homemade Angry Birds Costume for under $7!
I just finished making an Angry Birds Costumes for my son Micah who is completely obsessed with the game (I'll post pictures from his Angry Birds themed birthday party soon). I took some pictures along the way. Hopefully it will help anyone interested in making one themselves. I used the instructions on The Clock Blog and just tweaked a few things. Remember I made this for my 5 year old son, so an adult may need to change things a bit.
First I folded a piece of red felt in half and laid it on top of an old crib sheet (if you don't have an old sheet buy the cheapest muslin you can find), traced a circle and cut it out. You should now have 3 identical circles (2 felt, 1 sheet/muslin).
I then sewed one of the red felt circles and the sheet together, leaving a small hole for stuffing.
Next, I cut a hole for face and arms and hand stitched the two layers closed. To do this I pulled the seems of the two layers together and stuck my arm up in the hole I left for stuffing to stitch the layers together. For the face I traced the smallest saucer I have and it was still way to big, so be careful. The arms are just 6 inch slits.
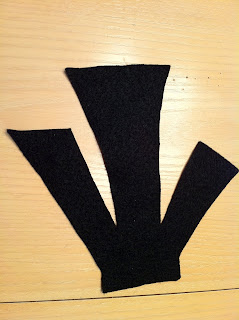
Then, I cut out 2 identical thingamabobbers for the top of his head in red felt. Sewed the two layers together and stuffed it. Leaving the bottom open. In retrospect I wish I had just made this part of the body the way The Clock Blog did. It would have eliminated a few steps. I also cut the tail out of black felt. I should have stuffed this as well because no amount of spray starch seems to make it stand up. Be sure to leave a little tab on both so you have room to sew it.
Then I pinned the thingamabobber and the tail inside the two layers of red felt. Make sure you have the bad side of the fabric on the outside.
Sew the two layers together and flip it inside out (or right side in).
Next, cut out and sew the white belly onto the top layer of fabric. Leave a little extra fabric hanging off the end. You don't need to stitch this part yet though.
Now for the fun part sketch and cut the facial features.
If you haven't used iron on adhesive before your missing out! I never hem anything anymore. I love this stuff!
Simply cut the shape you need...
...and iron it on!
Stuff it! I have a loveseat thats seen better days and is heading to the dump very soon so I used the stuffing from the cushions. If you've got some old pillows that would work great too. Be creative because polyfill is expensive!
Fold the excess white felt under and sew.
The finished product!

Here's the cost break down...
1 1/4 yard red felt $3.12 (with 50% off coupon)
1/4 yard white felt $.62 (with coupon)
3 sheets of felt $.90 cents
Old sheet free
Stuffing from couch free
Iron on adhesive $2.25
Posted by Shana at 3:04 PM 28 comments
Labels: cheap, DIY, halloween, Homemade red angry birds costume, Tutorial
I'm Baaaaccccckkkkk!
Well life is slowing down slightly these days. I have one child in second grade, one who just started kindergarten and two in preschool. Which means I now have seven and a half hours a week to myself! So hopefully I'll be able to start posting from time to time. Brace yourself, I've got over two years worth of post to catch up on!
Posted by Shana at 2:56 PM 0 comments
Thursday, May 21, 2009
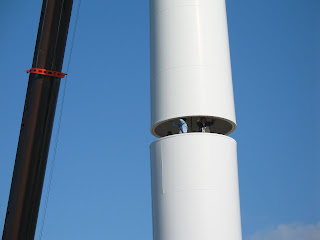
Windmill Construction
My husbands company finally put up their windmill. You wouldn't believe how long it has taken. It's been at least 3-4 years in the making. They had to put up a test windmill for a year to make sure there would be enough wind and then the electric company put up all kinds of red tape because it's going to produce a third more energy then the company uses and the town will be buying it from them. Obviously, the electric company didn't like the idea of it cutting into their profits. My husband said it should pay for itself in 5 years.
So from now on when your coming home on the pike keep your eyes open for the giant windmill.
Prepare for picture overload...
Posted by Shana at 2:15 PM 3 comments
Labels: Construction, Windmill


